~Please also have a look at my other Star Wars costume reproductions! ~
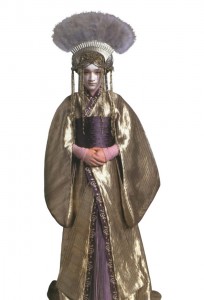
Queen Apailana at Padmé / Amidala’s burial ceremony
 |
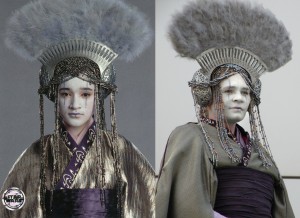 |
| The costume as seen in the movie | Picture of the original costume compared to my reproduction |
Pictures of the finished costume can be found at the bottom of the page. If you’d like to skip the making process, just scroll down!
A pretty thorough research site (image wise that is) for Queen Apailana’s costume can be found at Padawansguide.
Just in case you have no idea who ‚Queen Apailana‘ may possibly be, watch Star Wars, Episode 3. At the end, when Padmé / Amidala’s funeral is going on, take a good look at the mourners; among them is the current Queen of Naboo (namely, Queen Apailana), wearing this outfit.
Material statistics (I’m updating this while I make the costume and use / acquire the materials; so until the costume is complete and this part of this sentence has disappeared, this list is NOT complete!):
| Material | Used for | Amount |
| ‚Diamonds‘ brocade | Kimono, outer fabric | 7 meters (7.7 yards) |
| Stiff cotton fabric | Kimono lining | 5 meters (5.5 yards) |
| Fabric dye, reddish purple | Kimono lining (except sleeves) | 3 packages |
| Silk / rayon fabric | Kimono sleeve lining | 2 meters (2.2 yards) |
| Velvet | Kimono trims | ~1 meter (1.1 yards) |
| Embroidery thread, silver | Kimono trims | 2 spools @ 200m / 220 yards each |
| Embroidery thread, gold | Kimono trims | 1/2 spool @ 200m / 220 yards each |
| Sticky stabilizer | Kimono trims | ~ 1 square meter / 9 square feet |
| Fabric dye, blue | Kimono trims (the velvet I had was reddishpurple; I overdyed that with blue to get closer to the blueish purple on the original trims) | 1 package |
| Embroidery thread, dark grey | Lace headpiece | 2 spools @ 1000m / 1100 yards each |
| Embroidery thread, light grey | Lace headpiece | 2 spools @ 1000m / 1100 yards each |
| Water-soluble stabilizer | Lace headpiece | ~ 1 square meter / 9 square feet |
| Silk / rayon fabric | Hakama | 5 meters / 5.5 yards |
| Silk matelasse | Under-Kimono „blouse“ | 5 meters (5.5 yards) |
| Fabric dye, dusty pink | Under-Kimono „blouse“ | 1 package |
| Golden buttons | Under-Kimono „blouse“ | 2 pcs. |
| Silk matelasse ‚fans‘ | Obi | 0.9 meters (1 yard) |
| Cotton Canvas | Obi | 0.5 meters /yards |
| Boning | Obi | 2.5 meters / yards |
| Metal grommets | Obi | 20 |
| stretchable cording (to provide comfortable lacing) | Obi | 2 meters / yards |
| Pearls, 4mm, light and dark grey | Headdress | 5,500 |
| Pearls, 6mm, dark grey | Headdress | 800 |
| Cut beads, various metallic / AB coated colors | Headdress | 8,000 |
| Long twisted bugle beads, old gold | Headdress | 2,000 |
| Various Polystyrene blocks and sheets | Headdress | …quite a few 😉 |
| Marabou feathers, 6-4 inch long | Headdress | 225 (!) |
| Polymer clay (Fimo) | Headdress | 2 small blocks |
| Epoxy resin | Headdress | ~300ml |
| Totals (so far): | Fabrics | 27.4 meters |
| Embroidery thread | ~4.500 meters (4545 yards) | |
| Pearls, bugles, cut seed beads | ~16,000 | |
| (no one said this would be a quick, easy and / or cheap costume using few resources, right? 😉 ) | ||
The embroidered trim
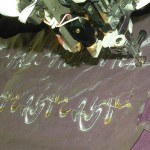
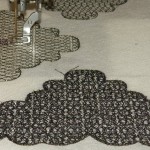
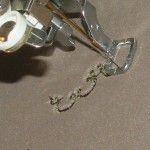
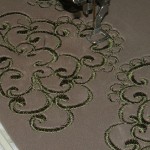
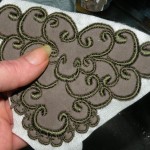
I’ve started on the Apailana costume by doing a test embroidery for the trim that’s used on the front of the kimono. Here’s the result of that test embroidery:
 |
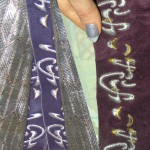 |
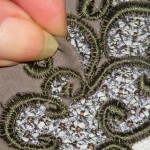
| The (test) embroidered trim for Queen Apailana still attached to the frame of the embroidery machine. The plastic over the velvet helps to keep the pile down while the embroideries are placed over it; it can be torn away when the embroideries are finished. The velvet is a scrap that I had left from Beatrice D’Este’s Tomb dress. | The finished embroidery (well, about 10 inches respectively three repeats of the pattern of it – it’s just a test embroidery, remember?…) on the left (with my hand holding it), compared to the original embroideries (on the right; exhibit photo). I guess I need to dye my velvet a tad more blueish, but other than that, I guess it looks good |
Just for the usual statistics records… what you’re seeing above (three repeats of the embroidery pattern; mirrored to become left / right side of the Kimono trim; each approximately 10 inches long, 1 1/2 inches wide) has 10,398 stitches, is stitched with two colors (metallic silver and gold, obviously) and takes about 45 minutes to embroider by machine.
It would work MUCH faster with non-metallic thread, but metallic thread is prone to break if the machine is running too fast, so I have to adjust the speed of the machine down to cope with that.
Also, of course, I digitized the embroidery myself; from two pictures of the original trim embroideries, as seen in the exhibit photos.
The outer Kimono fabric
As for the darn, unobtainable metallic ‚arrowhead‘ brocade (which I’m tempted to dub the ‚Unobtainium fabric‘, *lol*!) which was used for the outer kimono:
I’ve spent YEARS searching for it, but without success; even if I knew the correct search terms: the original brocade has an ‚arrow feather‘ design, called “Yabane“ in Japanese, and was probably a Saga Nishiki brocade.
Edit (5 months after I finished this costume!):
By now there’s an alternative fabric available, which HAS the correct yabane pattern, and even *looks* metallic (though it’s not – it just looks as if it was…)
It’s a printed fabric, available here on Spoonflower. This should really be printed on the cotton silk fabric that Spoonflower offers since that will enhance the ‚metallic‘ look.
Also, there’s a matching trim fabric (with printed „embroideries“ – the fabric isn’t really embroidered; just printed to look as if it was embroidered) for Apailana’s kimono available here – this should be printed on a slightly more matte fabric, like Organic Cotton Sateen. A yard should be plenty for the entire kimono trim.
Please note that this is NOT the fabric I used for the reproduction which is described on this page – if, however, I would have to do it again, I would definitely use the printed yabane fabric to make the kimono.
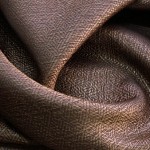
But I happened upon the following, diamond-patterned brocade, which remotely looks like the arrowhead brocade:
 |
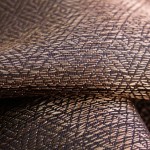 |
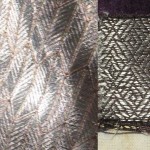
As you can probably see, the shiny threads (which are apparently rayon, unlike the backing, which is polyester) are copper instead of silver. I hope that I can bleach the fabric, so that the rayon threads will become maybe light silver/copperish to white, which would work very well in getting pretty close to the appearance of the original fabric. So far I’ve just ordered that fabric, so the test whether I can bleach it or not is still up to be taken.
By now I’ve taken that bleach test (and also dyed the velvet for the trim a tad more purple. Here’s the result:
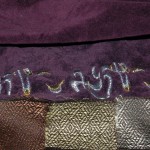
Top: Velvet in previous color; bottom: Velvet (with the embroideries) in the slightly more blue, over-dyed shade; which should now match the original velvet.
Bottom: Left: Diamond brocade in its original color; center: After one batch of careful bleaching; right: After second batch of careful bleaching.
Note how the shiny rayon threads look almost like metallic threads (compared to the velvet above it, which IS embroidered with metallic threads!); which is something I very much hoped for 😀
I guess I need to use a less blue-ish silver for the embroideries, though, so they match the bleached brocade better; but I already have such an embroidery thread.
Also, just to compare the bleached end result with the fabric of the original Apailana costume brocade…:
Yay! I’d say that’s it! 🙂
It’s not an exact match (I said that before, didn’t I? And also, the comparison pic isn’t to scale; the diamonds are smaller in person compared to the original fabric pattern – maybe like „two diamonds per arrow“, if that makes sense), but I think the colors color looks correct, which is what was important to me in the first place.
After I had bleached the fabric, I started making the outer kimono.
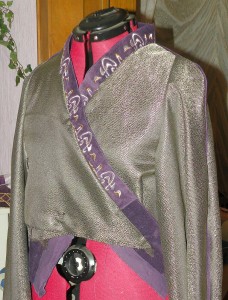
Here are the first two pics; they show front and back of the outer kimono. Sleeves (of course with accurately piped seams!) are already attached and I’ve pinned the embroidered trim to it. The pics are taken with a flash, so it’s a bit brighter than in person:
 |
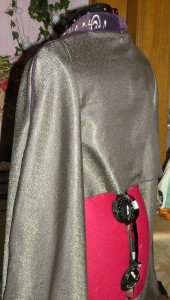 |
The sleeves aren’t „stiff“ enough yet, because the lining in the entire top is still missing. That will soon change, however 🙂
I’ve decided to basically ’split‘ the kimono where the obi will cover it. That’s because I had to mind the pattern of the fabric, and wouldn’t have had enough fabric if I had cut the parts in one piece.
It’s still taking almost 6 meters / 6 yards of fabric, by the way; and that’s just the outer fabric – double the amount for lining as well. Also, piping and trim velvet are not included in that calculation!
Here’s a first pic of the (still mostly pinned, yet assembled) outer kimono:
Pics of the completely finished kimono can be found at the bottom of the page.
The inner Kimono fabric
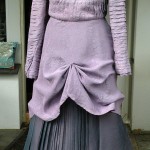
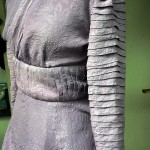
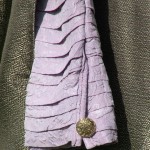
The fabric of the inner kimono, best to be seen at the sleeves and the neckline, is a dusky pink cloqué fabric, which is laid out in pleats (some people would call that ‚large pintucks‘) along the neckline and around the sleeves.
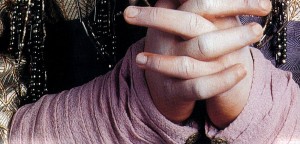 You can perfectly see the pleated sleeves, and also (partially) the larger, old-golden buttons at the underside of the sleeve in this picture of the original costume.
As I already had a likely silk matelasse fabric in my stash – with an embossed roses pattern instead of the ‚bubbles‘ cloqué, but still suitable – I decided to use just that.
But since the fabric is pleated along the neckline and around the sleeves, I had to sew those pleats into the fabric before sewing the inner kimono, and of course before dyeing the fabric (read here why I usually sew before I dye my finished garment!).
Here’s a picture of the pleating in progress. Each pleat is about 5/8 inch wide, and overlaps to the next pleat by 1/5 inch. Note that without the pleating, I would need a bit less than a yard of fabric for both sleeves; but since they’re pleated this way, about 3 yards of fabric go into them (because the fabric is being pleated and therefore takes a bit more than three times as much fabric as a non-pleated sleeve!).
Note that I’m already using pink thread to sew down the pleats.
Since my sewing thread is polyester, it won’t dye with the rest of the fabric; so I already have to use the correct thread color for the finished garment.
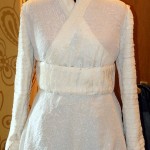
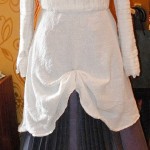
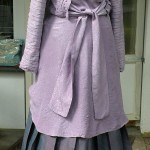
Here’s my inner kimono after sewing. Since I occasionally like to make something that I can also use as everyday wear, I decided to make a complete dress (of which the pattern is a modified version of my ‚Fast and Furious‘-dress). The center bottom front of the skirt is just pinned into pleats; I can easily remove the pin and have a normal dress with a straight skirt:
 |
 |
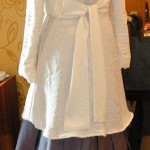 |
| Buttons on the sleeves are still missing. And of course I still have to dye it. But I LOVE the sleeve- and sash pleating to bits  |
||
Here are more pics of the dyed under kimono:
Now, concerning the original buttons – there’s, as far as I know, only one picture available that shows a tiny portion of the original buttons; this one to be precise:
Here’s my version of those buttons:
The skirt- and outer Kimono lining fabric
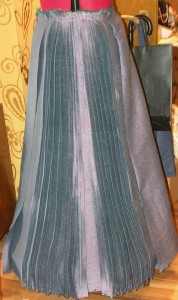
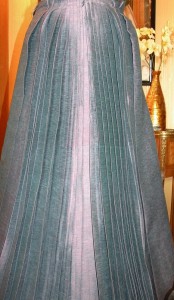
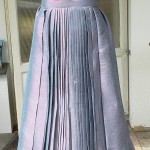
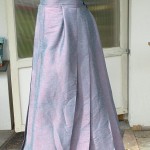
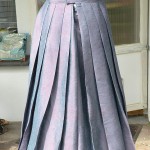
The pleated skirt (actually, because of the fact that the pleating on left / right side of front is facing towards the center, I don’t believe it’s a „skirt“ but a Japanese hakama – read more below!) that’s worn beneath the outer Kimono (and which is only visible at the center front bottom opening of said outer kimono) is some kind of fine, „pinstriped“, closely woven silk taffeta.
The very same fabric was used to actually line the sleeves of the outer kimono; this is pretty obvious from some of the larger exhibit photos:
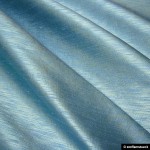
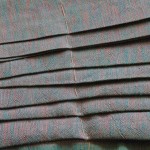
I think I found a good substitute for that fabric; it just has the wrong color:
…so nothing like being able to dye your own fabrics, right? 😉
The fabric is a rayon / silk blend; so I may be successful with the ’separate‘ dyes for silk and rayon method. Also, since it’s already blue, I just need to use reddish dyes to achieve the purple look of the original fabric.
Here’s the fabric after I dyed it:
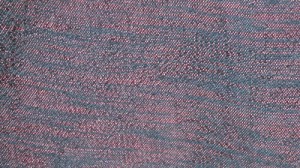 The dye turned out pretty well IMHO, except that the ‚blue‘ part turned out a tad greenish (because they had a greenish tint to begin with), but I can live with that since the overall appearance is still correct.
Other than that, I think the fabric looks really good.
On the subject of what that garment actually is, I have made this interesting observation:
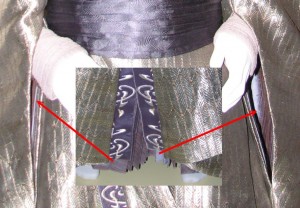
In the official photos, you can see lots of the „thing“ that’s beneath her kimono (click the image to enlarge!):
 but you can only see that it’s obviously pleated, not a) what it’s made of or b) into which direction the pleats are facing.
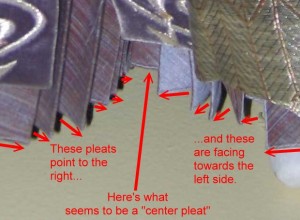
The exhibit photos show a much tinier gap between the two sides of the silver / platinum colored kimono, but ONE exhibit photo gave it all away – color, material, and, in my opinion, surprisingly also what type of garment this is. It’s this photo (enlarge to see the details):
That, dearest readers, shows that the pleats of whatever she is wearing are all facing towards the center front of, well, whatever it is. Plus, there seems to be a center pleat. Also, you can see the shininess and color of the material very well, which seems to be a kind of taffeta woven with mottled yarn (which gives the pinstriped effect – see the fabric picture I posted above).
Anyway, there’s only ONE garment I can think of – particularly in combination with what looks like a kimono and an obi! – that can possibly have pleats which are facing inwards; and that is a hakama. Here is a convenient link to a Google image search, in case you have no idea what a „hakama“ may be – basically, it’s a martial arts type of skirt-pants garment.
And yes, there are various types of hakamas -some with many pleats, some with fewer pleats, made from very different materials, fancy and not-so-fancy hakamas and so on.
But they all have one thing in common – the pleats are always facing towards the center front 🙂
I decided that I wouldn’t make a traditional hakama (since those are pants, not skirts). Since I wanted to wear a small hoopskirt beneath it (to make the kimono flare out at the bottom), pants wouldn’t exactly have worked. So I made some sort of ‚hakama skirt‘:
The obi / sash
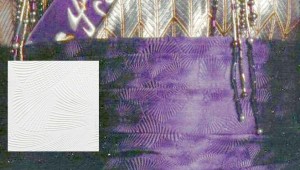
The obi (or sash) is made from a matelasse, brocade or jacquard fabric that seems to has some kind of stylized fans woven into it. It’s dark, blueish purple and the color matches the velvet.
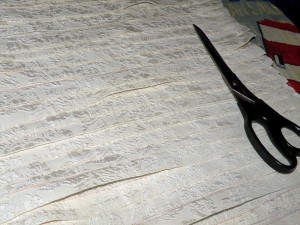
A very likely matelasse is available at Golden Silks, which is where I ordered it to make the obi. It’s white, but it’s silk, so I can dye it.
Here’s a picture that compares the original obi fabric – I have enhanced the photo to show the obi pattern detail – to the Golden Silks matelasse (white square):
It’s not an exact match, but I think it will work very well for the obi; particularly if dyed purple.
I’ve constructed the sash by first making a corset-like structure from sturdy cotton canvas (with boning, of course!), then basically draped the fans matelasse over that and hand-stitched it in place.
Here’s what that looks like. Sorry for the colors; they’re totally off. I took them at night and indoors with a flash. In reality, the sash fabric is a nice dark-to-medium purple:
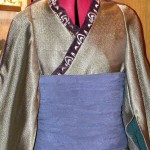
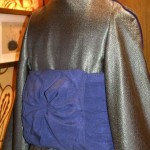 I also added some kind of ‚cushion‘ to the back, to hide the lacing of the corset. In my opinion, that gives a nice obi appearance.
Here are some more pics taken outside. Giving it a second thought, I will probably overdye the obi using burgundy dye to make it a bit darker and more reddish; it’s not quite matching the dark reddish-ness of the embroidered trims:
 |
 |
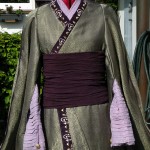
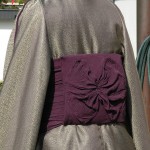
Here are two pictures of the over-dyed obi / sash. MUCH better, IMHO:
 |
 |
The headdress
The headdress that Queen Apailana wears – a Shiraya fan headdress; very similar to Queen Amidala’s Kimono headdress which is also known as a Shiraya headdress – is an interesting piece, and just because it consists of so many different pieces, it’s very easy to get confused while looking at it.
So when I was planning my reproduction, I first broke it down by looking at some really large pictures and find out what those different pieces are.
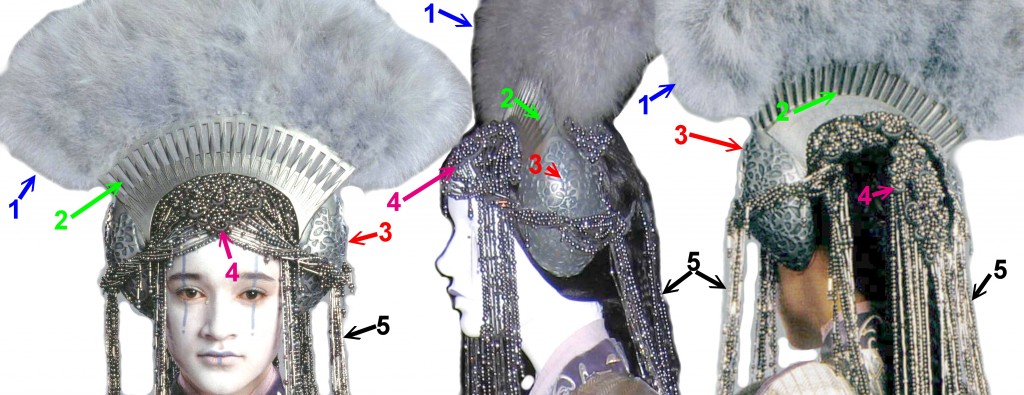
Here’s my initial studying picture – which, when printed out, is 120cm wide and lifesize for my reproduction! – in which I numbered the individual pieces; I will break those numbers down in the table and text below:
| Number | Description |
| 1(blue) | The marabou „fan“ |
| 2 (green) | The silver „arch“ |
| 3 (red) | The ear „eggs“ |
| 4 (pink) | Beaded lace appliqués |
| 5 (black) | Strands of pearls |
By the way, before I continue to pick that headpiece apart:
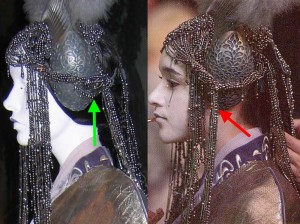
There’s a difference between the exhibit headpiece and the movie (and promo pics!) headpiece. You can see that difference above:
On the movie / promo headpiece, there are strands of pearls hanging down (numbered as ‚5‘ in the front view to the left) from the center of the ear „eggs“, right at the side.
Those strands don’t seem to be there on the exhibit headpiece (side view, at the center of the pic above) – but if you look REALLY closely and compare that side view exhibit pic to the ‚movie version‘ back view (on the right), you can basically ’see‘ how those side strands have been ‚tucked backwards‘ on the exhibit headpiece; they’re looped under, over and through the strands that ‚continue‘ towards the back.
Here’s a picture that compares the exhibit headpiece to the movie headpiece. The red arrow points to the strands of pearls in question on the movie version; the green arrow points to the strands that are obviously tucked back on the exhibit version:
So basically it’s the same headdress – with the difference that someone at the exhibit didn’t arrange the strands of pearls correctly.
- The Marabou „fan“
As described below (read ‚The silver „arch“), this part is attached to the ‚comb‘ in the silver arch.
I’ve decided to make a base from a thin polystyrene sheet for the marabou fan, then reinforce it with thick wire (basically the same wire that I used to reinforce the structure of my Jamillia headdress), and after that, glue the marabou feathers to that base.
Here’s what the finished marabou fan looks like on my headdress:
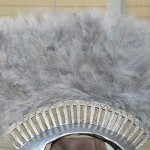
I know it’s almost unbelievable, but there are no less than 225 marabou feathers (with a length of 4-6 inches each) on this fan. I wouldn’t have believed that either; initially I thought that I could do it with approximately 75 feathers! 😆 - The silver „arch“
For a long time, I thought the ‚arch‘ was a closed shape; but when studying the arch closely, it eventually struck me like lightning.Take a look at this exhibit picture: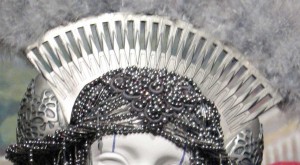 In particular, I’d like you to look at the background BEHIND the headpiece. It’s green on the left, and beige-ish on the right side of the headpiece.
Now look at the headpiece again; the ‚teeth‘ (or comb-like) area right beneath the marabou fan.
What do you see in those rectangles that definitely aren’t the silver headpiece…?
RIGHT… THE BACKGROUND BEHIND THE HEADPIECE!
I didn’t chose the term ‚comb-like‘ for no reason, you see. The marabou fan sits on top of the arch… and said top of the arch is constructed like an arched comb; you can see through it between the ‚teeth‘ of the comb.
The thickness of that comb (from front to back, that is) can be seen in this picture: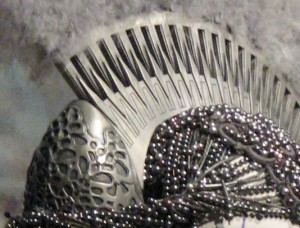 So basically, what we have is an arch that’s sitting on top of the beaded lace appliqués, and on top of that, there’s that comb with those teeth (between which you can see through the headpiece), and on top of that, there’s the marabou fan.
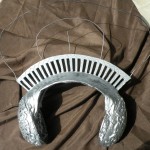
Originally – before noticing the ‚comb‘ – I had planned to make the arch from expanding foam (from which I would have carved the arch), which I would then have covered with epoxy clay for a smooth surface; but with that comb on top, this method is not practical since the foam would have been way too thin and therefore prone to breaking; particularly in case it should ever happen that the headpiece has to withstand any kind of wind, which would hit the base of the marabou fan and try to tear it off.
Also, don’t underestimate the possibility of bumping into something with a headpiece like this!
So choosing a different material was in order; and I’ve more or less decided that I’m going to create the arch using polystyrene blocks (for the base of the headpiece) and sheets (for the base of the marabou fan).I’ve by now ordered those blocks and sheets and wait for them to arrive.
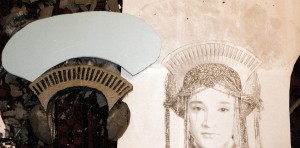
After my blocks and sheets had arrived, I started by tracing an outline of the front view to one of the 80mm (a bit more than 3 inches) thick polystyrene blocks. Note the life size printout of the headdress next to it: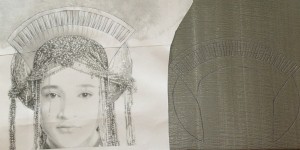 Then I just started carving it out, using an X-Acto knife and a polystyrene hot cutter. Here’s what it looked like after I had cut out the rough shape, plus about half of the ‚comb‘ teeth:
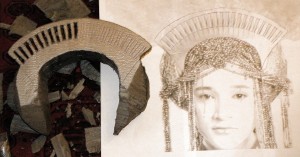 Here’s more; this is the cutting mostly finished and also, there’s the (light blue) base for the marabou feathers fan cut out as well:
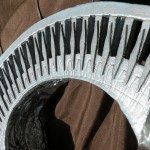
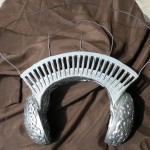
 Here’s the little ‚diamond shapes‘ that can be found on the original headpiece too. I made those from polymer clay, hardened them in the oven, then glued them to the comb:
- The ear „eggs“
The ‚ear eggs‘ have a (in lack of better terms) lace-like overlay, made from the same material as the eggs themselves. Said lace-like overlay partially overlaps on the eggs.
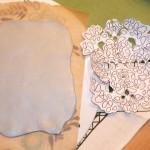
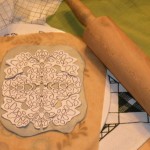
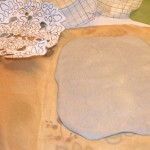
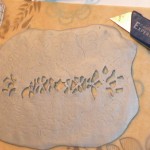
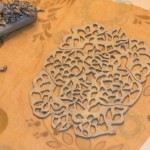
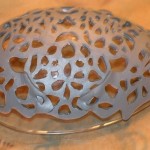
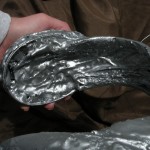
Here’s what I think that overlay looks like when spread out and not overlapping: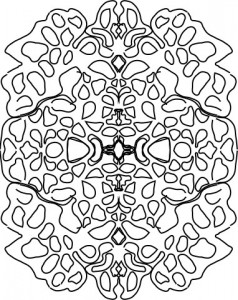 I can cut that lace-like overlay from a rolled-out sheet of polymer clay (fimo), then – in the baking oven – harden it over plastic easter egg halves, which I bought in a DIY shop, and – after that – glue those halves to the arch.
That was the theory, here’s the reality:
- Assembling the headpiece
Some pics of the headpiece, as the single parts came together.
In these pictures, I had just glued the pieces together (using epoxy glue – nothing else will really work with the mix of styropor, plastic and polymer clay), had added one layer of acrylic spray paint, then sanded that again to get a smoother surface. The wires on top go through the entire structure; they will later be laminated (again, epoxy resin; NOT polyester resin (which would DISSOLVE the styropor base!)) to the feather fan to support it:And here’s the headpiece structure, completely painted and weathered (to give the appearance of ‚old silver‘ that the original headdress has), with the marabou fan attached:
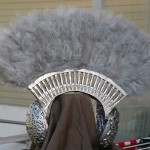 Front of the headpiece
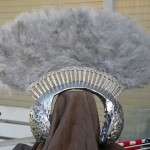 Backside of the headpiece
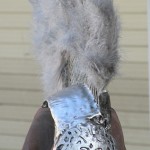 Side of the headpiece
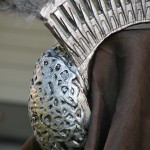 Detail of front comb and ear egg
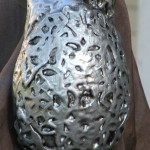 Detail of ear egg side
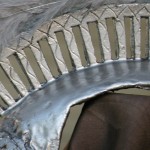 Detail of comb backside
By the way, at this point – the comb with ear eggs and marabou fan – the headdress structure weights about 150 grams (5.3 oz).
That, in case you have no idea, is extremely lightweight for a headpiece like this (and it’s only so light because the base structure is made from styropor – the main part of that weight comes from the epoxy resin that I used to stabilize and coat the styropor; from the lace-structure of the ear eggs and from the metal wires inside the headdress).
Because of the metal appearance it looks very heavy though; and people are usually shocked when they pick it up since they initially use too much force to lift it 😆 - Beaded lace appliqués
This is actually interesting, and to see it, you need to look at the headpiece REALLY CLOSE.
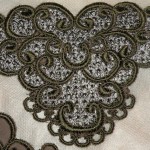
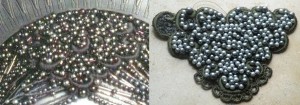
Like this: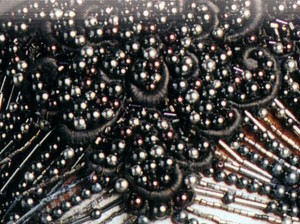 What you’re seeing here is NOT just a mass of pearls. Well, that too – but somewhere in between and bordering them, there are those ‚worm-like‘, anthracite „structures“; and that’s a lace appliqué – which was then beaded with pearls.
According to my ‚lifesize‘ picture, for my own headpiece, those have to be 4mm and 6mm pearls.
But the base – the lace appliqué – must of course come first!Again, good that I have an embroidery machine and can actually digitize lace.
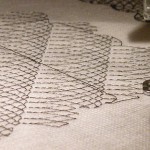
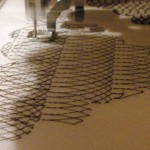
To do that, I first took all available pictures of the lace that was used in the headpiece, and used those to digitize my lace.
Here’s what my lace looks like in my embroidery software (which, in this case, is Stitch Era Universal – simply because it has more (and more suitable!) fill patterns than Brother’s PE-Design which I usually use!):
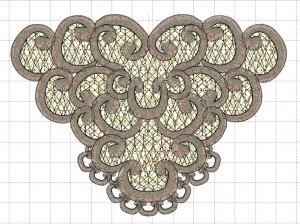
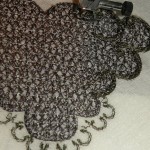
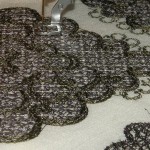
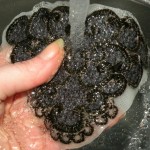
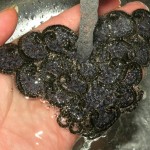
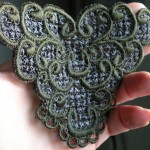
If you compare this to the picture of the original part of the headpiece with the lace underlay above, you can probably „see“ the lace in the original headpiece much better.After digitizing it, I started to embroider that lace on my embroidery machine. Here are the single steps of the embroidery process:
Here is a first picture of the lace beading in progress (right) compared to the original lace front piece (left):
Considering that the original was taken under studio lightning while mine was photographed with natural lightning, not too bad, I guess. Just a bit more to fill at the upper left corner; then I can start threading the first strands of pearls 🙂
- Strands of pearls
From my ‚lifesize‘ picture, I could make out four different type of pearl strands that hang down / are twisted on the headdress:
The arrangement of those strands of pearls is best visible in two pictures; namely these:
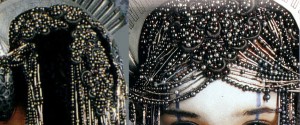
You can, for example, see that each side of the front lace piece has the following strand types attached (starting from center front – and yes, those are symmetrical on both sides):
4-3-3-1-3-2-4-2-3-2-4 etc. etc.
Why yes, that’s insane if I want it EXACTLY like that. It would be MUCH easier to just go ahead, buy SOME strands of seed beads, cylinder beads and pearls and arrange them SOMEHOW. Also, I think that this headdress must be pretty heavy with all those pearls. But it’s pretty 🙂
I’ve tried to count (actually it’s more like estimated) the number of strands for each of the above mentioned types.
I came up with (this is for both sides!):
– 24 strands of type 1;
– 22 strands of type 2;
– 28 strands of type 3;
– 40 strands of type 4.
That results in the following amounts of pearls / bugles / seeds required:
– long (twisted?) bugle beads: 576 (type 1) + 748 (type 2) = 1.324
– 3mm pearls: 1.920 (type 1) + ~250 for lace = ~2.200
– 4mm pearls: 384 (type 1) + 2.560 (type 4) + ~200 for lace= ~3.000
– 6mm pearls: 196 (type 2) + 196 (type 3) + 320 (type 4) + ~80 for lace = ~800
– cut seed beads, 3x2mm: 4,312 (type 3)
So all in all, that’s no less than approximately 11,636 pearls, beads and bugles which I will have to put on that headdress. If each of them just weights 1/10 gram, that’s more than one kilogram of pearls. And that’s JUST the pearls, without the structure. -.-
Here’s what all those pearls, bugles and seed beads look like when just laid out on a table without being worked into a headdress like this:
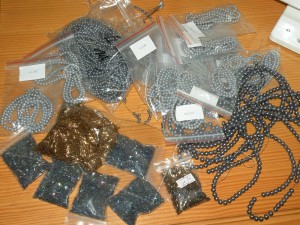 That MAY not look like lots of pearls; but I assure you – those ARE a lot of pearls. Approximately 15,000 to be precise – I bought a few more in case my estimation above turns out to be wrong. With a project like this it’s always better to have leftover pearls in the end than having too few to finish.
First pic of the beading of the strands in progress:
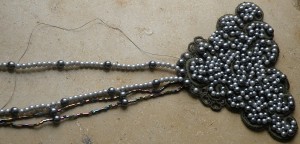 Four strands (two each of type 3 and 4) finished… 110 more to go. If I manage to bead 10 strands per day – besides beading the lace pieces (the one shown above took me 3 days to bead!) – I could be finished in maybe three weeks.
More beading progress – further strands added to the front piece; plus I’ve made and started to bead the piece of lace that will end up at the back of the head:
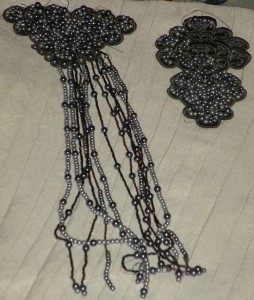 And, yes, beading takes, like, forever 😐
The finished costume
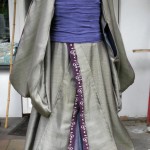
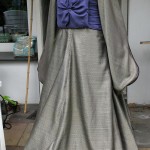
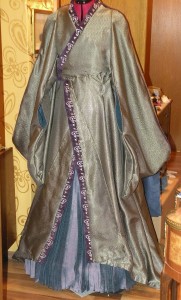
First some pictures of the finished costume on a dress mannequin:
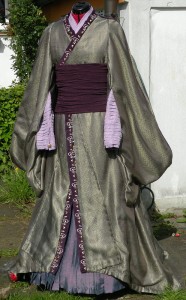 |
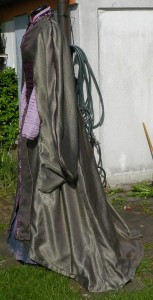 |
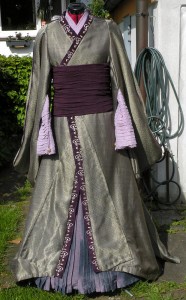 |
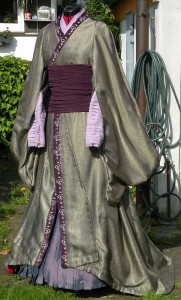 |
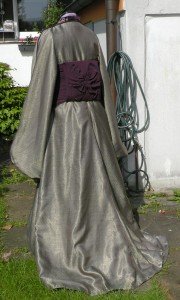 |
|
Comparing the reproduction to the original costume:
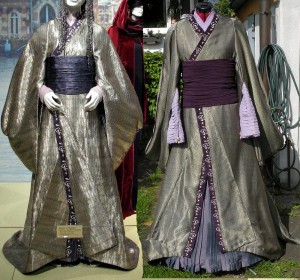 My trims and the sash could be a bit more blueish and maybe the sash / obi could be a tad less wide, but other than that, I think it’s a good and faithful reproduction.
As for the sleeves not ’standing out‘ like on the original costume – well, my dress mannequin doesn’t have arms to provide that kind of support 😉
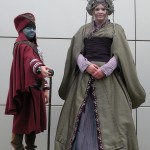
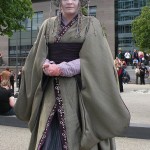
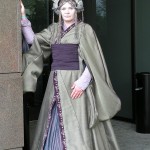
Costume being worn
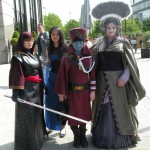
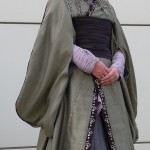
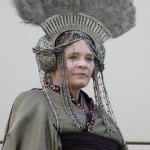
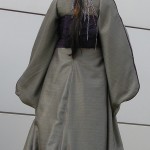
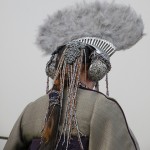
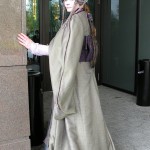
I wore the costume at FedCon XXI, here are some pictures. First a few that I’ve photoshopped next to the original costume:
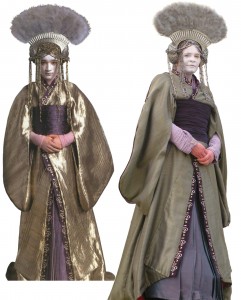 |
|
 |
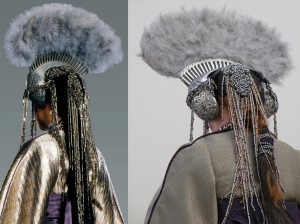 |
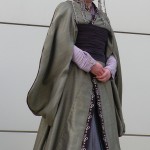
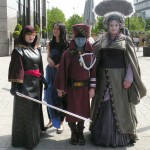
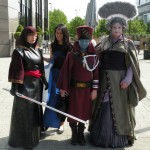
And some more, straight from FedCon:
 |
~Please also have a look at my other Star Wars costume reproductions! ~

Do you sell the embroidery files? I’m having no luck finding anyone who can design the appliques for me. They say the pictures are too pixalated.
This is a great reproduction! I really admire the amount of work that has gone into this (as with all of your reproductions). I just wanted to let you know that hakama do actually come in a skirt variant – they’re called andon-bakama (lantern hakama), as opposed to the trousers version, which are called umanori-bakama (riding hakama). I have a hakama which is actually in a very similar shade to your one!
Masterful work. You are a true talent. And the amount of effort it took! All I have for you is applause and esteem 🙂
I really love this idea of outfit. It’s my favorite outfit in the star wars Movies I-VI. But somehow i still do not know where to purchase this outfit. I looked everywhere and still can’t find it. Who can i buy this from ?
I don’t think that you will be able to find a ready-made Queen Apailana costume. You will probably have to ask a seamstress or costume maker about having it made.
My own Queen Apailana costume, which I have shown on this page, has by now been sold – and is now owned by another member of the Rebel Legion.
would be amaze if you create youtube to record all your work and i would follow it up