Emperor Palpatine / Darth Sidious‘ Robes
The tunic
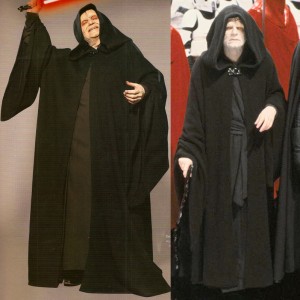
Darth Sidious / Emperor Palpatine, the way he appears in the prequel trilogy (left) as well as in the original trilogy (right)
As you can probably see in the image above, the appearance from the prequel trilogy changes a tiny little bit from the prequel trilogy (Episode 1-3) to the original trilogy (Episode 4-6).
It’s not the coat that changes, it’s the tunic beneath it:
The prequel trilogy shows a plain tunic without any sash, the original trilogy shows a diagonal drape (from – in the picture – approximately left side of collarbone to right front of the hip, with an additional knotted sash.
There are quite a few more pictures which confirm this setup, they can be found on Google (if you do a thorough search) or just look at the movies. The two above, however, show the two different setups of the tunic best.
The friend I made this for said it didn’t matter which version I made. I had the idea I could make BOTH in ONE tunic.
So I started by creating a base tunic. I also had the idea that Darth Sidious required SOME kind of embellishment on his tunic, so I created embroidered imperial buttons. Note that those are never visible when the coat is worn, it’s just that the wearer will know they are there. Also note that NO ONE can say IF there would indeed be some kind of embellishment on the actual tunic or not, because you NEVER see that part in the movies (or exhibit pictures, for that matter).
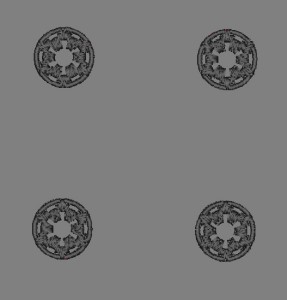
Design preview for the imperial buttons in my embroidery software. If you know Star Wars, you will instantly recognize the imperial logo.
Here’s my embroidery machine stitching the buttons:
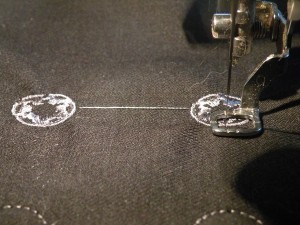
I decided for a slightly lighter grey embroidery thread.
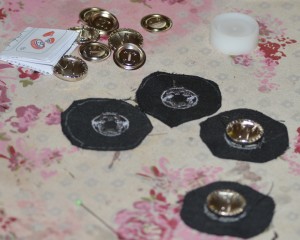
Assembling the fabric-covered buttons
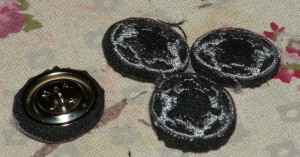
Finished fabric-covered buttons. Need to cut a few more thread ends; but other than that, they look good.
To create the actual outfit, I used my proportional method, which I explained in detail on the „Red Emperor Palpatine“ page. That meant starting with a photo of the future wearer in a door frame to which a measurement tape is attached, overlaid with an image of the costume. That enabled me to not just get the height of the drape / sash right, but also to determine the precise length of the sleeves, exact size of the brooch as well as the exact proportional sizing for the textured piqué fabric for the coat.
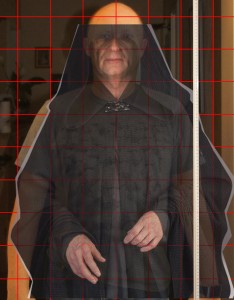
(and yes, the photo I have is full length. This cropped image is just to illustrate the method of proportional sizing).
What I also noticed when looking at pictures of the original costume is that Palpatine’s tunic has precisely the same collar as Darth Maul’s undertunic, which is a rolled collar.
Do not confuse this with a „mandarin collar“, which would be a separate piece to be sewn to the tunic – the rolled collar is ONE PIECE with each of the front side parts of the tunic. Alleycatscratch has a page on how to draft that kind of collar to an existing pattern.
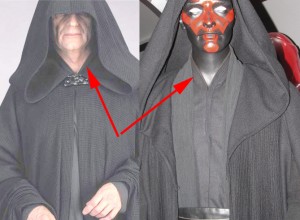
You can see the collar of Palpatine’s tunic in the neckline of the coat in this (level-enhanced to show that detail) photo.
Maul’s undertunic’s collar also has line embroideries, which Palpatine’s collar has not; but the shape is the same.
So here’s what I basically came up with for the prequel tunic:
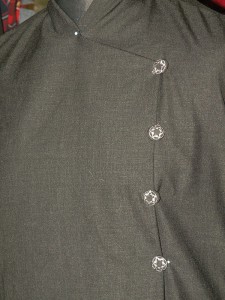
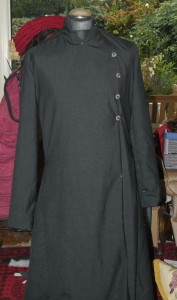
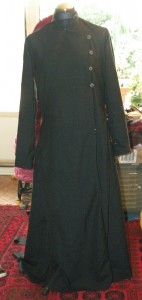
(Just pinned to the dress mannequin; no hemming yet – at that point, the buttons are also just attached with pins so I could see where to place them.)
Finished tunic, with two options to wear it.
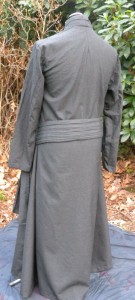
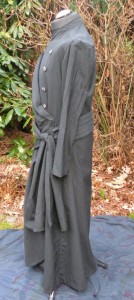
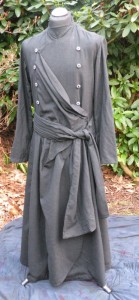
First option: Original trilogy with front drape
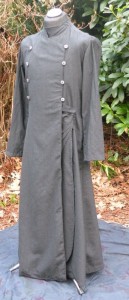
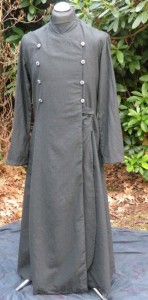
Second option: Prequel trilogy tunic without drape.
You are NOT looking at two different tunics. That’s both the same tunic. It’s just that the front can be folded over to the left or right, revealing or hiding the front drape.
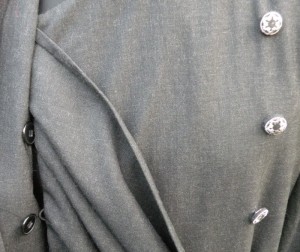
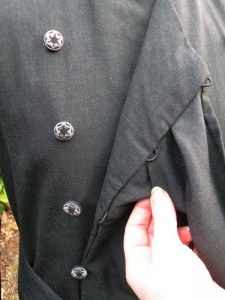
The closures: Both sides have buttons and loops to close them.
Additionally, there are counter-buttons inside each side of the tunic to hold the loops of either side, depending on which side is folded under and which is folded over.
The brooch
The original brooch looks a bit like worn gunmetal with a bit of soldering on it.
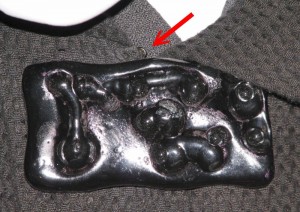
Original brooch; red arrow pointing to a visible hook and eye closure on the coat.
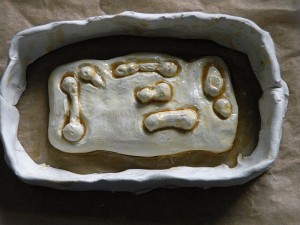
I first sculpted the brooch in clay; then cast it using the cold cast metal method.
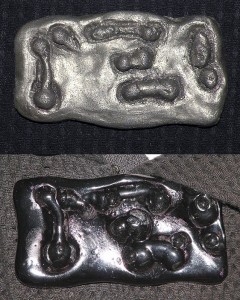
Finished brooch; top shows my cast, bottom shows the original brooch to compare. Still needs some „dark“ weathering in this picture.
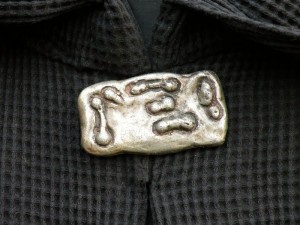
Finished brooch on the coat.
This photo actually looks MUCH lighter than the brooch really is. That’s because of the black fabric behind it – the camera desperately tries to adjust to that darkness.
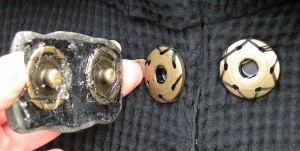
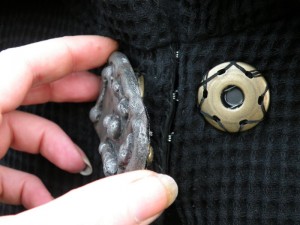
This is how the brooch attaches to the coat – by the means of two large strong snaps.
The coat
| Note: I created this coat before having seen the original one in person. After visiting the Star Wars Identities exhibition, where I took photos with a regular and an infrared camera, I now know that my construction of the coat is wrong insofar as the original coat (minus the hood) has been constructed from a single large piece of fabric – the only seams are the side seams, which become the seams under the sleeves. That means to faithfully reproduce the original coat, however, fabric at least 2-2.5 yards wide (and at least 4.5 yards long!) would be required. |
The coat closes at the top front with hooks and eyes. One of the eyes can be very clearly seen in this closeup exhibit picture:

Undone metal eyelet visible at the center front top beneath the brooch
The bottom of the sleeves, to approximately elbow level, are gathered.
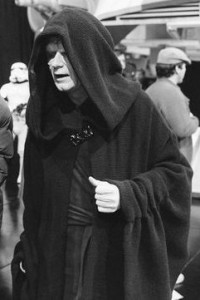
Gathered sleeves. Note that they seem to be „off the arm“ in this picture.
This proves that the gathering was done in a straight line from basically „top of shoulder“ to the bottom of the sleeve. If the gathering had been done from the front of the shoulder, it would not fall off the arm like this.
The entire sleeve is trumpet-shaped, with a point at the very bottom.

The point in which the trumpet sleeve ends at the bottom can be very clearly seen in this picture.
That point goes down to approximately mid-calf if the arm is not raised. Note the slight trailing of the coat on the floor towards the back.
The lining of the sleeve is a low sheen satin or taffeta fabric. The outer fabric of the sleeve is folded over to the inside by approximately 2 inches, the rest is lined with that satin or taffeta fabric.
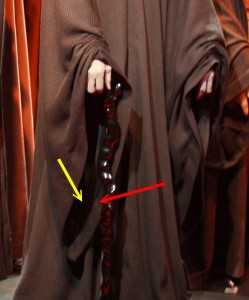
Yellow arrow points to lining, red arrow points to fabric.
The coat, by the way, is a tad shorter than the tunic.
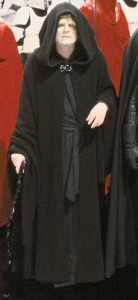
This photo shows the tunic showing under the hem of the coat.
At the front, the coat is approximately two inches off the ground.
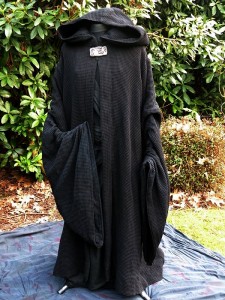
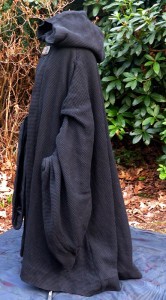
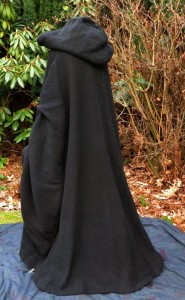
The finished coat from all sides. Of course, without a head, the hood just looks kind of silly.
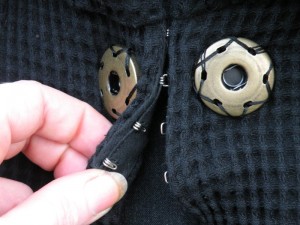
Closure of the coat – as on the original coat, this reproduction closes with hooks and eyes behind the brooch.
Hi do you have a size for the buttons please possible even the embroidery details as i wish to get some made 🙂
Many thanks in advance,
Chris
Hi
amazing work!
do you sell this designs?