The dress diary of an Italian Renaissance dress
that was not inspired by ‚Ever After‘
(In progress, that’s why the below shown navigation doesn’t completely work yet)
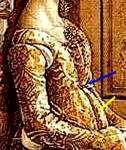
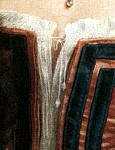
When looking at dresses in Italian Renaissance paintings, I found this one here particularly interesting:

Detail from „The Visitation“ by Domenico Ghirlandaio, 1485
Navigation for this site:
The patterns
Dress diary; separated in:
Observations
Buying fabrics
Making
Some notes before starting the diary on…:
Already before incidentally finding the overdress fabric I was looking for a matching pattern for both over- and underdress – just for fun at that point of time, as. as I will explain later in the dress diary, I didn’t think that I would ever find a matching fabric for the overdress – but just for fun, after becoming interested in the gown, I looked around what I could use.
It was clear to me from the beginning that the overdress was cut on the bias (also explained later in detail in the diary), so that the sides of the skirt would practically run along the selvedges of the fabric.
Jean Hunnisett had analyzed this particular overdress in her book „Period costumes for stage and screen from Medieval to 1500“, but is in my above explained opinion wrong concerning how this pattern should be placed on the grain of the fabric – in that book, the front and back middle of the overdress or ‚tabard‘ as Jean Hunnisett calls it run on the straight grain, leaving the sides running on almost cross grain.
In any other way, however, that pattern seemed to be correct, except that it shows no possibility how to tie the front part back so that it will fit smoothly over the bust.
I decided to use this pattern anyway, just that I would turn the pattern pieces in a way that they would run along the selvage edges of the fabric with the sides.
For the underdress I decided to use an old pattern from Simplicity – this one here:
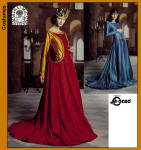
Simplicity 8725 (discontinued)
I am, of course, talking about the blue dress in the above shown pattern picture (or the golden one without the red overdress, if you can imagine that).
This is a very nice and surprisingly historical pattern, as it has absolutely no princess or other seams at the front or back (except the center back seam, which is supposed to be laced up). The seams of the sleeves are turned towards the back, which is also historical, and the sleeves are supposed to close with a row of buttons. I personally think that this is one of the most versatile and historically correct patterns Simplicity has ever made.
The only problem this dress has if used the way of the actual pattern is that the skirt takes up incredibly much fabric as the sides have set in two half circle gores of fabric (!). This leads to a skirt circumference of almost 10 yards if the train is not cut too long, and over 12 if the train is cut according to the pattern.
However… if you’re experienced and can change the half circle gores into, let’s say, quarter circle gores, then you can change the amount of fabric (and therefore of course also the resulting skirt hem circumference) to a fraction of that amount. I have found that one can use anything from 3.5 to 15 yards of fabric for this dress, given that the fabric used is at least 56“ wide.
This is why this rather modern Simplicity pattern was my pattern of choice for the underdress of the ‚Visitation‘ combination.
By the way, the pattern: I’ve been collecting this pattern since the year 2000, if I remember correctly. I have it in several sizes, some multiple times, and am always looking around on Ebay if I can find any more of it – let’s face it – a pattern printed on thin pattern tissue doesn’t live too long once it’s unfolded… My greatest wish would be that Simplicity would produce this pattern again.
And now – here’s the dress diary.
| Observations, planning & fabric purchases | |
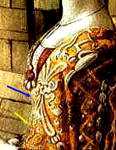
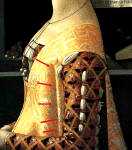
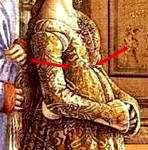
| c. mid 2005 | I started finding this picture interesting in about mid 2005 – it’s a simple, but beautiful gown and it’s cut in a very interesting way. The golden and white overdress seems to be opened at the sides, revealing the red, diamond patterned underdress beneath. The fact that the pattern on the overdress runs straight down the sides of the skirt, which are cut at an angle, tells me that the back and front of this overdress consist of two pieces each – left and right – and that those pieces must have been cut on the bias towards center front and back. This would also explain the beautiful draping of the skirt at the front. It’s a rather simple pattern, and the only thing I’m wondering about is how the top front portion is held back so that it fits so smoothly over the bust. A belt, which just runs over the front and passes below the back part of the overdress could help, I guess or something like several ribbons from the front sides which are fastened under the back panel – likely to the way how the gauntlets are fastened.After searching some more, I found two other paintings by the same painter which depict or seem to depict the same dress:   The first (left) picture definitely shows the same Lady as in the picture above, wearing the same clothes as above. Her hairstyle, clothes and even her pose with the scarf in her hands are identical to the picture above The first (left) picture definitely shows the same Lady as in the picture above, wearing the same clothes as above. Her hairstyle, clothes and even her pose with the scarf in her hands are identical to the picture aboveThe second (right) one seems to show someone else (the face shape is different), but the overdress fabric is so much likely that I think it’s at least made of the same fabric or depicts the dress from above after or before alterations: The sides don’t seem to be split and the overall shape of the dress seems to be slightly different (compare the wideness of the shoulder strap in both pictures and also the way how the skirt drapes from the waistline). The laced on sleeves, which are also different from the picture above, wouldn’t be an indication that this dress is a different one – as they are laced on, they could have been exchanged.. As all pictures here were painted by Domenico Ghirlandaio, I think it’s safe to say that such a dress – pictured several times – did not just spring from his imagination, which often is the question when looking at an exquisite gown in an old painting. Instead, I daresay that we are, again, having the ‚favorite dress effect‘ here – also see my thoughts on Lucas Cranach’s favorite gown concerning this. |
| 2006 | |
| 7th of February | Making this dress – or even just planning to make it – was out of question for me, as I would never have thought that I could find an affordable, yet matching fabric for the overdress. And then it happened. Incidentally I practically stumbled over the perfect fabric for that overdress – white with golden birds on it. It’s acetate brocade, though. As I also wasn’t sure where on earth I could ever wear this gown, I hesitated for a considerably long time to buy the fabric and make it – even if it was extremely affordable at just over $12 / yard.. The point when I definitely had to buy this fabric was the moment when I found that the seller of this particular brocade was running out of this fabric. There were exactly six yards left, and I had calculated that I would need 5.5 yards. After thinking about it for yet another week I finally bought the fabric on the date given on the left. That was in an auction from this Ebay seller. |
| 9th of February | Paid via Paypal – delay because I couldn’t access the Internet for two days. |
| 10th of February | According to the seller, the fabric was shipped. |
| 24th of February | Received a note from the customs office that my fabric has arrived. As it’s Friday today and they will close earlier, I won’t be able to get there before Monday or Tuesday. |
| 25th of February | The hunt for a matching fabric for the underdress started when I found the fabric for the overdress. The initial ‚Visitation‘ fresco seems to show ‚just‘ some kind of diamond patterned cut velvet, which I could easily replace with a chenille upholstery fabric that has such a diamond pattern, but the other painting of the same Lady clearly shows the raised diamond pattern filled with flowers. For simplicity reasons I decided to be satisfied with ‚just‘ a nice diamond patterned velvet or chenille fabric. That’s simple? No, it’s not if you’re living in Germany and obviously all sellers who carry a matching fabric live in the US and don’t ship to Europe *grrr*So after searching for that particular fabric for almost a month, I have finally decided to stop my search for a diamond patterned cut / burnout / chenille velvet for the underdress for the moment. First, because this search takes far too long for my taste; second, because I have found that within a short time after stopping to search for something special without finding it, it will practically pop up everywhere; and third, for the moment I have found a nice substitute which will also make a nice underdress. I can still wear that ’substitute underdress‘ for other occasions, e.g. ‚Medieval Markets‘ in Germany which have practically no dress code, except that it has to be long and flowing – then it’s considered ‚medieval‘. The fabric I found is from another one of my favorite Ebay Sellers – this one. It’s a garnet red ‚Celtic cross‘ brocade, which basically still has some kind of diamond pattern. I know that the original underdress is rather orange-red than garnet, but I already know that anything remotely resembling ‚orange‘ wouldn’t look good on me, so I decided for garnet red (and would have done the same with any cut velvet – dark / burgundy or garnet red, that is).My choices of fabrics should make it relatively clear that I won’t be making (or am aiming to make) a historically correct, period garment. The outsides of both over- and underdress will be made of acetate brocade, and the insides will be lined with cotton. Both isn’t „Renaissance period“ at all; so while the costume’s shape and appearance will probably look historic, it won’t be historic (does that make any sense…?). |
| 28th of February | I have my fabric, yay! What a nice birthday surprise (and besides one email from a friend and a call from my family the only thing I got)! Here’s a picture (which, admittedly, was taken later, when I had already started to make the gown): It’s super beautiful, but it has one mistake: It’s an ivory fabric patterned with golden birds etc. When buying the fabric I assumed that it would be reversible, as most of those acetate brocades are – meaning that I could simply flip it to have an ivory fabric with golden birds, as the one that can be seen in the painting. Well, guess what? I was wrong. The backside *is* golden with white patterns, but it’s quite dull and doesn’t look so nice. I will make the overdress from that brocade, anyway – who cares if it’s white with gold or gold with white…? It’s beautiful, and that’s the only thing that counts… I am currently watering the fabric (to preshrink it – see my washing tips here – so that I’ll afterwards be able to also wash the finished overdress), which will take until tomorrow, and then it will still have to dry. I guess I can start on the overdress on the day after tomorrow (and am excited like a little girl about that)! |
| 1st of March | Before starting to cut the fabric, I observed the three above mentioned paintings a little closer, to find out about the exact shape of the front bodice. Here are my observation results:
Then there are those strange pleats: The pleats at the sides seem to be necessary to make the top portion of the tabards fit better |
| 2nd of March | I’ve started to make the dress!Please note that the dress seems just ‚white‘ in the following pictures, but it’s not – in reality, it has the following colors: (I’m just writing that in case you have missed the fabric picture above…. 😉 )Here are the first pictures of the pinned overdress. And just to show how important the pleats at the sides are… …three pictures without the pleats, showing (in order) the dress from front, side and back… …and here are two more pictures of front and side – *with* the pleats pinned: I guess you can see the difference between ‚with‘ and ‚without‘ pleats at the sides; it’s great how they can be used to shape the dress. I will have to add an invisible waistband to the inside, to take the stress from the fabric and this is also a good opportunity to get the bands which will close behind the back portion of the tabards – those will be the ends of said belt. It also dawned me that I would need a camicia (=Italian chemise; some kind of long shirt that was worn below the clothing) and which can clearly be seen under the lacings of the underdress in all pictures, but best in this one:
I remembered that I would need some kind of camicia anyway – for my ‚Moretto‘ gown… so I thought I would make one camicia which I could wear with both gowns. The one from the ‚Moretto‘ painting is slightly different, but basically the same in style and appearance if you forget about the gap in the front opening and the ruchings along the neckline and sleeves, which only the Moretto chemise has. But they HAVE to be different – don’t forget that the ‚Moretto‘ camicia from c. 1540 is about 60 years younger than the ‚Visitation‘ camicia from c. 1485 – just recall how much our modern underwear has changed in the last 60 years since the 1940s (and, no, that wasn’t different back then)! It’s made from crushed cotton voile, and it’s so comfortable that I wore it for sleeping the night after I made it. I’m seriously thinking about making another one for sleepwear. |
| 29th of March | The fabric for the underdress finally arrived! It went straight into the washing machine, at a *very* gentle (wool) cycle, to make it a bit softer and to wash away that strange, chemical odor which new acetate fabric usually has. |
