– Edited to add:
During to a flood that hit my house, the fabrics and partially completed parts of this costume were destroyed.
So until I decide to actually redo everything with new fabrics, the pages for this gown only serve as a documentation and memory of what I made; not as a dress diary.
When planning my gown, I wrote…:
So… the very first thing I made for the bodice was… no, not the pattern.
As I was still in the right mood to work with duchesse silk from making the skirt, I made the bows which are placed on the bodice’s sleeves.
I then made a muslin, which will later work as flatlining of the bodice’s outer fabric, and test pinned it on my dress mannequin to see if – and how – it would fit.
After making some changes on that muslin, I unpinned it and:
- traced another batch from that muslin pattern set, which I cut out from doubled linen. This double layer of linen will act as a lining and will hold the necessary boning for the bodice, which, as unhistorical as it might be, will also work as a corset.
- laid the original muslin pieces out on the silk velvet fabric that I want to use for the bodice, pinned the layers together, cut them out and loosely stitched along the outlines of each pattern piece, by doing this attaching the two layers – outer fabric and muslin – to each other.
After doing this, I first made up the lining with boning.
Lining test pinned, still without boning. Fits great, and the shape is just perfect!
I boned:
- the center front and sides back with steel boning, to straighten them and to prevent any bending or creasing when the bodice corset is laced up;
- the seams along the „V“ shaped insert with spiral boning, as well as
- each seam on the bodice with spiral boning.
Afterwards I constructed the outer layer of the bodice with the fabric which, as mentioned above, was flat lined with the original muslin fabric.
For the V-shaped insert at the front I cut a piece of silk duchesse – the height of the pattern piece, but twice the width, and smocked it every 2 inches on the cross grain by simply pulling threads in the fabric, until that pattern piece had the width of the original pattern piece.
I attached the ruched piece of silk duchesse to the original muslin pattern piece by carefully stitching it from the back (muslin) side to the muslin, in a way that the thread used for sewing was not visible on the front (duchesse) side.
By the way, for this hand sewing I used some threads which I had pulled from the fabric when I „marked“ the fabric this way while I had cut the strips of fabric for the skirt frills. This made absolutely sure that the sewing thread was the same color and material as the fabric, which makes it even more difficult to actually see any sewn threads in the smocked material.
I couldn’t wait any more – I had to see if I had „guessed“ the pattern right.
Here’s the sewn sides of velvet, pinned to the front middle, ruched duchesse part. It’s not sewn yet and there’s no lining in it, so it creases considerably on the dress mannequin and is also not quite straight, but… *SO* *MUCH* *LOVE*!
First picture is taken with *really* bright flash, so you can see that the velvet is indeed blue. However… in daylight it looks like in the other two pictures: As if it was black with a blue shimmer (for the Lord of the Rings Fans: Yes, that’s the Arwen „Bloodred“ Black-blue velvet shimmer).
And isn’t that center front smocked piece just lovely? *So* love that bodice!
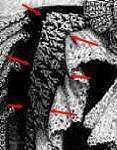
Now, as you can see in this close-up of this picture, the V-shaped insert and the side neckline is edged with what looks like velvet edging:
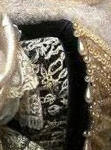
(note the little „corner“ on the top edge of the edging, which clearly indicates that this indeed is edging and not that particular pattern piece’s border)
So… what I did to achieve exactly this was the following.
I did *first* sew all velvet pieces (with their muslin flat lining) together, without the smocked duchesse front middle piece, (as mentioned above, for the test pictured the smocked piece was just pinned in for the pictures) so that I had two halves of the bodice (right and left side – as it’s back laced) without the front pattern piece, which is made of a different material.
Then I attached the lace to the front edge and to the back edge. I hand stitched the lace down with running stitches along the edge of the pattern pieces.
Front lace attached; the placement of the edge is marked with a running stitch in red thread
Afterwards, I attached a strip of velvet to the top edge of the neckline on all pattern pieces by hand basting, covering the edge of the lace, plus an „edging“ to the part of the front side pattern pieces which will later be sewn to the front middle duchesse piece. The machine firmly attached that strip of velvet to the bodice.
Then I – again – hand basted that strip along the edges of the pattern piece (sewing silk velvet is hell…), and again… the machine did the rest.
And that – basically – was how I attached the „velvet edging“ to the bodice.
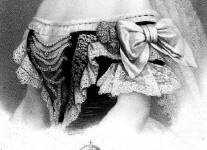
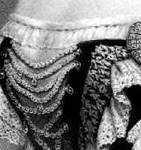
Now – as you might remember from my planning above – I want the rather simple neckline frill from this picture. Enlargement:
So I made the pleated strip, plus that „white edging“, and have sewn it to my bodice.
This is what the bodice looked like from all sides when the strip – not ironed yet, so the pleats are rather facing upwards than downwards, as supposed – and the edging was attached:
Two things are still missing in these pictures:
a) the sleeves and
b) the lining.
Almost finished!
I’m utterly surprised how small the waist looks in the picture that was taken from the backside. Did I lose *that* much weight? I mean – well, alright, it’s almost thirty pounds since I made the „Pelican“ gown, but… Yes, I think I *did* lose that much weight!
(I wonder if I could still wear the Pelican gown?)
So.. two more things to do… attaching the sleeves and sewing in the lining.
| You might wonder why I’m not updating this site at the moment. Well..I’ve cut the boning for the entire bodice and inserted it – except of one steel bone which should go into the back, next to the lacings. This particular steel bone was cut – I know that I *did* cut it – but it seems as if my son had taken that bone – and obviously he has hidden it somewhere; I can’t find it. I’m perfectly certain that this particular bone will pop up in some toy chest when I least expect it, and I’m not willing to cut another one because as soon as I’ve done it, experience tells me that I will right away find the already cut boning. So… I’m just waiting for that last boning to show up somewhere, so that I can finally finish this gown – which will then just take about an hour 😉 |
Time needed for the bodice, as pictured above:
Two weeks, about two hours each day; makes about 28 hours. Let’s say 25, because I had many breaks.
I *really* have to revise my original calculation, dammit!
What I don’t like so far:
Just as with the skirt – the rather plain look of the lace. Again, my solution will be silver embroidery and perhaps some Rhinestones.
Most fun thing while making the bodice:
Well… I guess… seeing it ‚grow‘ under my hands.
Oh, and I liked the smocking a lot – something I should get used to if I want to make the Victorian Evening gown I am still planning, as this is ruched in *lots* of places…
Most annoying things:
This time… sewing the strips of silk velvet.
And – well, it’s not annoying but rather unnerving – the fact that when I attached the pleated strip along the neckline, I had to sew through up to *fourteen * layers of fabric. I repeat, fourteen. My sewing machine sounded as if it would break any minute.
(And if you want to count for yourself:
Silk velvet – one layer.
Flat lined with muslin – makes two layers.
White edging was folded – another two layers, makes four.
The pleated strip is a) folded over, just like the edging, *and* pleated three times – makes six more layers, Results in a total of ten so far.
However – sometimes I had to sew over a seam of the bodice (e. g. on the shoulder), so another two layers of muslin and silk velvet… twelve layers.
On the front edging of the bodice, there’s additionally the silk duchesse insert, lined with muslin… makes another two, resulting in fourteen.)
Poor machine! Coming to think of it, I’ll better sew in the lining by hand – *eighteen* layers (two layers of lining, folded over on the seams, makes another four…) of fabric are probably a *bit* too much, even for my very old, reliable „Dürrkopp“ leather sewing machine, which I sometimes use to sew leather if my modern machine refuses to stitch them.
Oh, and attaching the lace in a way that the pleating would look at least remotely even – on ‚*both* sides of the bodice.
