~Please also have a look at my other Star Wars costume reproductions! ~
Navigation menu for this costume:
Analysis of the costume – Making the headdress – Making the gown
Queen Amidala – Red Invasion / Theed Throne Room Robe
Making the reproduction gown
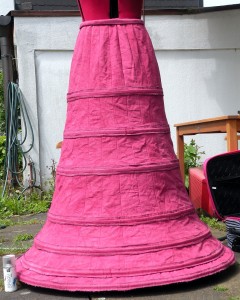
As for actually making the Red Invasion gown, I started with the hoopskirt. The hoopskirt is essentially for the actual look of this gown because it basically has to be gravity-defying, with the trumpet shape the dress is supposed to be having.
So I constructed it from 24 panels of very, very sturdy cotton twill and added 7 rings of hoop steel to it. It actually works like a lampshade – the hoop steel rings stretch the fabric of the skirt, so it seems to float over the floor.
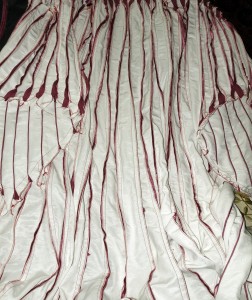
Please ignore the wrinkled look – as I said, that cotton twill is VERY sturdy – so sturdy in fact that it refuses to be ironed. Then again of course this is just the hoopskirt, and when I wear the actual dress, it will never be seen.
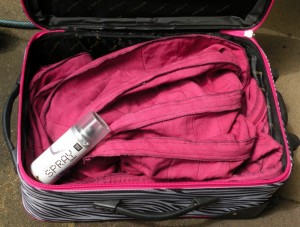
Someone asked me recently how I am going to travel with this dress (or rather pitied me for having to be limited to local events), since that person assumed that I wouldn’t be able to pack the hoopskirt flat.
This is why you can see a small spray can in the lower left corner of the picture – it’s there so you have something to compare the size to 😉
Of course the hoopskirt (just like the dress) can be packed flat. It’s stiffened with hoop steel, after all – flexible spring steel which is designed to be put into hoop skirts. I’m actually very glad that this stuff was invented in the 1840s (and made the large crinolines of the 1850s possible), because seriously – I can’t imagine being limited to non-flexible cane (which was used for hoopskirts until the invention of spring steel) or non-flexible wire.
So here’s my board-sized suitcase, packed up with the hoopskirt… and the spray can so you are able to compare the size 🙂
The hoop steels just spring back to their actual size and shape as soon as I remove the hoopskirt from the suitcase.
As already mentioned on the analysis page, the single pattern pieces of the dress and sleeve are separated by piping.
Here’s how that is done; note that I had pre-pigmented the satin for the piping but not the bengaline for the pattern pieces. Since the satin took the dye not as well as the bengaline, this was necessary; but it’s also a rather good way to illustrate how the piping is done.
- Cut bias tape. Lots of it. Approximately 90 yards, to be precise.
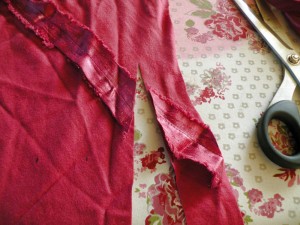
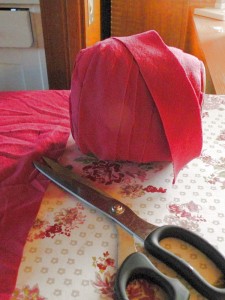
And just because 90 yards of bias tape can quickly end up in a mess never seen before, put it on a spoon from the start. Cut a few yards – spool. Cut more – spool. Spool until the spool (or whatever you designated as a spool) is full. Personally, I needed four spools of this size: - Next, sew the cording into the bias tape. I’m using that using a cording foot on my machine.
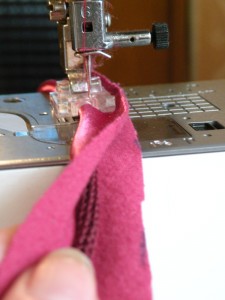
Same as the bias tape – just to keep that amount of piping organized, you want to use a setup something similar to this: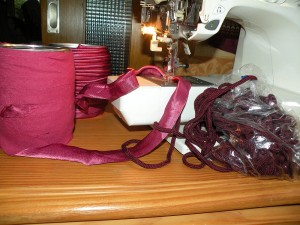
The roll of bias tape, when sewing, usually sits in my lap; next to it, the bag with the cording (which just looks messy but is not – the cord is pulling out without being tangled).
Behind the machine, I set up another spool on which I collect the finished piping.
By doing it this way, I can produce a bit more than 20 yards of piping in one piece.
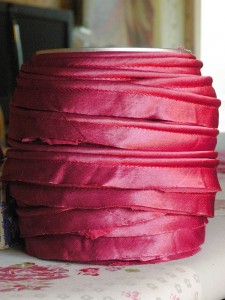
This is what a full spool of piping looks like – again, for a dress like this, you need four of those a-bit-more-than-20-yards of piping spools: - Pin the piping between the layers of the single pattern pieces. You want to do that thoroughly, every 4 inches a pin; to prevent the layers of pattern pieces with the more slippery satin piping beneath them from drifting apart while you sew.
- Sew the sandwiched layers together. I am still using my cording foot to do this. That allows me to have a bit of control over where the cording in the piping is (which I cannot see between the layers, just feel).
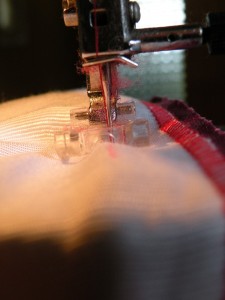
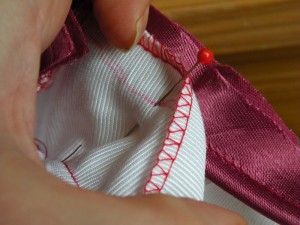
You may notice that there’s quite a bit of lint building up above the needle; which is obviously from the red piping. You need to clean the needle often because that lint may up in parts of your machine where it will make your machine incredibly sad, lol. - Here’s what a finished, piped seam looks like from the backside:
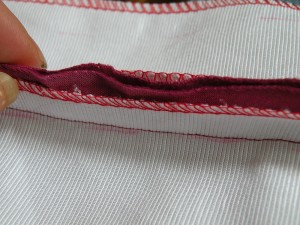
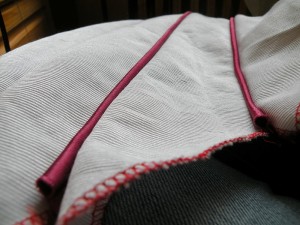
This is what the backside should look like when ironed flat, with the piping layers separating (and covering) the bengaline pattern pieces edges: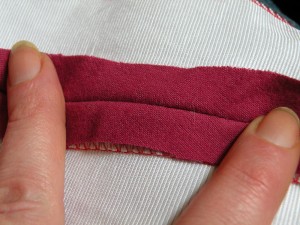
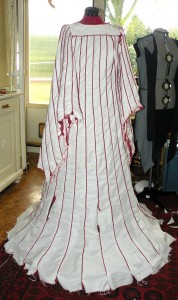
And, last not least, here’s what the piped seams look like from the front: - Did I mention you will use all those 90 yards of piping on the dress? Here’s a photo of the dress body and sleeves laid out just so you can marvel at the incredible amount of seams, piping, and, in particular, sewing time that is required to assemble the body and sleeves of the dress, lol:
Navigation menu for this costume:
Analysis of the costume – Making the headdress – Making the gown
I am trying to find a sewing pattern for this particular gown, for my 14 yr old daughter. I am afraid I am not skilled enough to make my own pattern, although I can sew LOL. My question is this. Do you have a pattern than I can purchase? You see, in December 2018, my husband and I are renewing our vows. Star Wars style . My 14 yr old daughter has requested that I make her gown, probably the hardest one that there is to make for Padme. Because I am making 2 gowns for the renewal, I need to start working on this one now. I am hoping that since your last comment on this was in 2013, that you have created a pattern that I can purchase. I thank you in advance for any information you can give me .
Thank you so much for making this blog post. I want to cosplay Padme and this is my favorite outfit of hers, but I had no idea where to start, so this really gave me a lot of information on how I can start. I haven’t sewed a whole lot but I have a long time to make it and I’m pretty confident in my ability to follow instructions and plan things out so I think if I just take my time and perhaps practice with a mock-up first I can do it, lol. I just wanted to say thank you since this is a really great resource! I’ll have to look at the rest of your site and costumes 🙂
Thank you 🙂
Hello! I was wondering if you have any more to post! I’m trying to make my own Queen Amidala cosplay and I can’t figure out how you’re going to make it. I’m quite a noob at cosplaying, but I’ve been trying to get better. Taking on a big challenge like this was my next big challenge, but I’m really hesitant to begin! I want to follow your dress to the T, but I can’t figure out how you’re going about this.
Hey, thanks for asking!
Yes, I’m almost finished with my own dress, just that I didn’t have any time to update the page, lol.
However, I’m afraid that even if I update the page, it won’t be helpful for your Amidala cosplay.
You see, I’m just a costumer – I make costumes; and I occasionally wear them – though that’s not my main goal when creating them; I basically just create them because I love to; and of course because I can.
However, I don’t even just remotely have any talent for acting – which, as you may know, is what’s definitely required for cosplay (=“costume play“ or „play in a costume“).
It’s safe to say that I’m not even a noob at cosplaying like you. I’m simply unable to cosplay – as I said, I just create and wear costumes, without the „play“ part.
So I can’t help you with the cosplay aspect of this particular character, sorry 🙁
The play aspect I can do on my own, but my god you are an absolutely fantastic costumer! Any help on the costume aspect would be more than appreciated! I’ve only done propwork with my costumes, and most of the fabrication has been minimal. I’ve got big armor, and props. Any tips you have/advice/any bones to throw would be awesome
Ah, so I apparently misunderstood your question. I thought you were asking about the cosplay, not about the costume.
Well, I already have a lot of information on this page for the costume. Best to start by creating the hoopskirt with the 24 panels, as instructed on this page. From that, you can develop a mock-up for the gown.
Hope that helps 🙂
What did you do with the mock up? Was that just a mock up and you created a different dress after in the bengaline red fabric? I’m extremely lost when looking at it. It looks beautiful, but I’m lost after you finished sewing all of it together there. I also had a question about the pattern you made on your dissection of the dress. Is that scaled to Natalia Portman’s size, or to you? And I would also be extremely interested in the designs for the gold embroidery. Would I be able to perhaps see/buy the designs off of you?
I am not quite sure what you mean by „Mock-Up“. I did not create a mockup for this gown; I used Bengaline fabric right away.
The fact that my gown is white in the pictures is due to the fact that I first sew, then dye; as mentioned in my „Sew first, then dye“ tutorial.
The pattern I made is, of course, made for my own measurements, not for Natalie Portman’s. I have no idea what her measurements are and I wanted to create a dress for myself… so… why would I have created a pattern for something that wouldn’t even remotely fit me (I’m a head taller than Natalie Portman)?
I haven’t updated this page for a long time. I have more photos (and even a video how I stitched the embroideries out) – I’ll eventually post them.
This is just the hoopskirt. Any instructions on the dress itself?
Well, for one, you could start by reading my analysis on this costume, which certainly will give you some insight on how things should be done.
That having said, I’m still working on the costume, so… patience, young Padawan 😉